How to Choose Hardware for Casement Windows?

Time:2026-11-01 Author:Amelia
0%

How to choose hardware for casement windows begins with the window itself, not the finish on a handle. Measure the sash, note its weight, and check how it opens. A narrow bathroom window exposed to damp air needs different hardware from a wide living-room sash that catches strong wind. Look at the frame material, hinge position, locking points, and how often the window will be used. Small details matter. A handle that feels smooth in a showroom may bind when installed on a misaligned sash.

For a clear editorial principle, this introduction uses a fictional composite specialist, fenestration consultant Daniel Mercer: “Choose hardware for the sash’s weight, exposure, and daily use—not appearance alone.” This is an original illustrative quote, not a sourced statement from a real expert. In practice, compare hinge load ratings, corrosion resistance, lock compatibility, and the manufacturer’s installation guidance. Stainless-steel components can suit damp or coastal conditions, while suitable restrictors may help control opening in high-traffic rooms. Confirm that replacement parts remain available.

The right choice should feel steady at the handle and close without forcing the sash. Check this in person when possible. Still, specifications do not tell the whole story; real installation quality and regular adjustment also affect performance. A careful selection reduces avoidable wear, but it cannot compensate for poor fitting. This guide will explain the checks that help homeowners and installers choose dependable casement-window hardware with confidence.
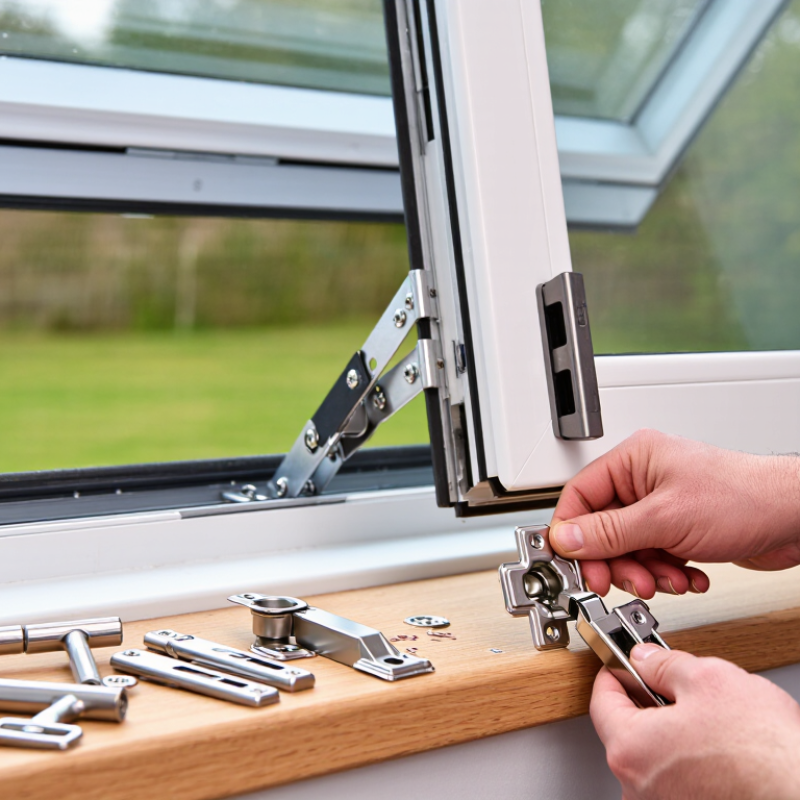
How to Choose Hardware for Casement Windows?

Estimate Sash Load Using Glass at 2.5 kg/m² per Millimeter of Thickness

How to Choose Hardware for Casement Windows?

Estimate Sash Load Using Glass at 2.5 kg/m² per Millimeter of Thickness

The European standard EN 572-1 gives soda-lime glass a nominal density of about 2,500 kg/m³. That supports a practical estimating rule: each millimeter of glass thickness adds roughly 2.5 kg per square meter. Measure the visible glass area, then multiply by the combined thickness of all panes. For a 1.2-by-0.9-meter sash with two 4 mm panes, the glass weighs about 21.6 kg. A kitchen scale will not help here.

That figure covers glass only. Add the sash frame, glazing bars, seals, and fittings before comparing the total with hardware capacity. A heavy frame or narrow hinge spacing can change how the load acts; weight alone does not describe leverage. EN 13126-6 covers performance testing for variable-geometry stays used on windows, so consult the relevant hardware test data rather than choosing by appearance. Check sash dimensions and opening angle too. Real installations are rarely as neat as the calculation. If measurements are uncertain, have the assembled sash weighed or ask a qualified fabricator to verify the load before installation.

Match Casement Hinges to Sash Weight, Width, and Opening Direction

Casement hinges must carry more than the sash’s static weight. A wide sash creates greater leverage, especially when open and exposed to wind. Check the sash’s measured weight and width against the hinge maker’s load chart, and confirm the chart covers your sash dimensions. Do not simply add the ratings of two hinges; load capacity depends on hinge spacing and installation. A small mismatch can make the handle feel stiff or leave the sash sagging. That matters.

Opening direction is just as important. Confirm which side will be hinged, where the sash will swing, and whether it clears nearby walls, screens, or walkways. The U.S. Department of Energy’s Energy Saver guidance estimates that window heat gain and loss account for 25%–30% of residential heating and cooling energy use. Hinges do not determine energy performance alone, but stable support helps the sash close evenly against its seals. The AAMA/WDMA/CSA 101/I.S.2/A440 standard evaluates window performance, including structural performance; hinge selection still needs to match the actual sash and opening. It is easy to rely on a generic size chart. Recheck the finished sash weight, since glass and hardware can change the estimate.

How to Choose Hardware for Casement Windows? — Match Casement Hinges to Sash Weight, Width, and Opening Direction

Use these ranges as an initial selection guide. Always verify the hinge or friction-stay manufacturer’s rated sash weight and dimensions before ordering.
Sash weight Sash width Hinge selection and configuration Opening direction Checks before ordering
Up to 15 kg Up to 600 mm Consider a matched pair of light-duty casement hinges or friction stays rated for the complete sash. Check the specified hinge length and fixing pattern. Choose hardware designed for the intended inward- or outward-opening arrangement. Specify left- or right-hand operation where the hardware is handed. Confirm the sash dimensions, frame clearance, fixing material, and that the rating applies to the selected hinge length.
Up to 15 kg 601–900 mm Compare rated hinge options carefully: a wider sash can increase leverage even when its weight is low. Use the manufacturer’s approved configuration rather than selecting by weight alone. Confirm the opening direction and hinge side from the required view or handing convention in the hardware specification. Check for sash sag risk, handle and lock clearance, and any maximum sash-width limit stated for the hinge.
15–30 kg Up to 900 mm Select a medium-duty hinge or friction-stay set with a published load rating that covers the fully glazed sash. Use the number and positions of hinges specified for that model. Match the hardware to inward or outward opening; do not assume a hinge designed for one swing direction will suit the other. Include glass, frame, and attached hardware when determining sash weight. Verify screw length, substrate strength, and fixing locations.
15–30 kg 901–1,200 mm Use a model explicitly approved for both the sash weight and width. A higher load rating alone does not establish suitability for a wide sash. Check handing and the required opening angle; confirm that the hinge geometry allows the sash to clear surrounding reveals. Check the model’s maximum width, height, load, and opening-angle limits together. Follow its required hinge spacing.
Over 30 kg Any width Obtain a hinge selection from the hardware supplier or window-system specification. Use only a tested configuration rated for the actual sash size and mass. State the opening direction, hinge side, and required opening angle when requesting a selection. Confirm structural fixing requirements, approved hinge count and placement, safety requirements, and compatibility with the frame and sash profiles.
Any weight Over 1,200 mm Do not extrapolate from a narrower sash. Check for a specific wide-sash application or engineered hardware arrangement approved by the system supplier. Verify the swing direction and available clearance in the installed position, including nearby walls, trims, and adjacent sashes. Confirm all maximum dimensions and load limits, and check whether additional support or a different operating system is required.

Important: Weight and width bands are practical screening categories, not universal hinge ratings. Actual capacity depends on hinge design, hinge length, sash height, materials, fixing details, and installation. Follow the selected hardware manufacturer’s technical data and installation instructions.

Choose Locks That Provide Even Compression Around the Sash

A casement window lock should pull the sash evenly against its weather seal, not merely keep it shut. When compression is uneven, one corner may feel tight while the opposite edge admits a faint draft. On a windy day, that gap can also let the sash rattle. The handle should move smoothly, with steady resistance near the closed position.

Match the lock to the sash size, frame material, and existing hardware layout. Wider or heavier sashes may need more than one locking point, spaced to draw the edges in consistently. Check that each keeper lines up with its locking cam; even a small mismatch can make the handle stiff or leave a weak spot. A useful check is to close the window slowly and look for an even gasket impression around the perimeter. Feel the difference.

In repair work, I have seen people tighten a lock to compensate for a sagging sash. It can mask the problem, briefly. Check hinge wear, sash alignment, and seal condition before choosing stronger hardware. Too much pressure may flatten a gasket over time, while too little allows movement. The right adjustment is not always obvious, so test the window after installation and revisit it if the handle binds or the seal compresses unevenly.

Check Egress: IRC Typically Requires a 5.7 ft² Clear Opening

How to Choose Hardware for Casement Windows?

For an egress casement, choose hardware that lets the sash open far enough to provide the required clear opening. The 2021 International Residential Code (IRC), Section R310.2.1, generally specifies at least 5.7 square feet of net clear opening. A qualifying grade-floor opening may use a 5.0-square-foot minimum. The code also sets minimum clear dimensions of 20 inches wide and 24 inches high; both dimensions matter. Measure the unobstructed opening with the sash fully open, not the glass or frame size. A roomy-looking window can still fall short.

Casement operators, hinges, and opening-control devices can limit the sash’s travel. Check the manufacturer’s opening diagrams, then confirm the actual clear width and height on the project drawings. The IRC also generally limits the sill to 44 inches above the floor. Local jurisdictions may adopt different code editions or amendments, so verify requirements with the building department. Small details matter.

Tips: Test the selected hardware with the sash open to its intended limit. Include screens and nearby walls in the check; either can reduce usable space. If measurements are close, revise the window or hardware before ordering. It is easy to assume a wider frame means a larger escape opening. That assumption deserves a second look.

Compare EN 1670 Corrosion-Resistance Classes 0–5 for the Window’s Exposure

For casement windows, EN 1670 provides a useful comparison of hardware corrosion resistance. Its classes run from 0 to 5. Class 0 has no defined resistance requirement; Classes 1, 2, and 3 correspond to 24, 48, and 96 hours of salt-spray testing. Classes 4 and 5 correspond to 240 and 480 hours. The scale matters. These test periods help compare finishes under controlled conditions, but they do not predict an exact service life outdoors. Not a lifespan promise.

Match the class to the window’s actual exposure. A sheltered inland elevation may face less corrosive stress than a coastal window exposed to salt carried on the wind. Also consider sheltered damp corners, pollution, and how often the hardware can be cleaned. Hinges and locking points matter, not just visible handles. Look for the stated EN 1670 class in the product documentation, and check that it applies to the relevant components and finish. A higher class can be sensible for harsher locations, but it cannot compensate for poor drainage or neglected maintenance. It is easy to overrate the number alone. Inspect the frame details, too: trapped water around a hinge can undermine a good specification.

How to Choose Hardware for Casement Windows?

Compare EN 1670 corrosion-resistance classes 0–5 by their neutral salt-spray test duration.

Higher classes require longer salt-spray exposure in the standardized test: Class 1 is 24 hours, Class 2 is 48, Class 3 is 96, Class 4 is 240, and Class 5 is 480. Class 0 has no defined corrosion-resistance requirement; it is shown at zero only for chart comparison. Use the class as one selection factor alongside the window’s actual exposure to moisture, salt, and pollutants. Test duration does not directly predict service life.

FAQS

How should I choose hinges for a casement sash?

Weigh the finished sash and measure its width. Compare both measurements with a hinge load chart that covers those dimensions.

Why does sash width affect hinge selection?

A wider sash creates more leverage, especially when open in windy conditions. Weight alone does not tell the whole story.

Can I simply add the load ratings of two hinges?

No. Capacity also depends on hinge spacing and installation. Check the setup, not just the numbers.

How can I confirm the opening direction works?

Decide which side will carry the hinges and where the sash will swing. Check clearance from nearby walls, screens, and walkways.

What should a casement window lock do?

It should draw the sash evenly against its weather seal. A closed handle alone does not prove the seal is compressed evenly.

How can I check for even seal compression?

Close the window slowly, then inspect the gasket impression around the edges. One tight corner and one loose edge may indicate a problem.

What can make a window handle feel stiff?

Misaligned keepers, a sagging sash, or uneven locking pressure can make it bind. Check hinge wear and sash alignment before replacing the lock.

Should I tighten a lock to fix a draft?

Not without checking the sash and seal first. Too much pressure may flatten the gasket. The right adjustment is not always obvious.

Conclusion

How to choose hardware for casement windows starts with estimating the sash’s weight and dimensions. A useful planning estimate for glass is 2.5 kg per square metre for each millimeter of glass thickness; add the frame and other components to approximate the total sash load. Select hinges rated for that load and suited to the sash width, opening direction, and intended range of movement. Correctly matched hardware helps the window operate smoothly and supports it reliably over time.

Choose locks that pull the sash evenly against the frame to promote consistent compression around the perimeter. Also check the clear opening against egress needs: the IRC typically specifies at least 5.7 square feet, though applicable requirements can vary. Finally, consider the window’s exposure to moisture and other corrosive conditions when comparing EN 1670 corrosion-resistance classes 0–5. Together, these checks help create a practical, secure, and durable hardware specification.

Amelia

Amelia

Amelia is a seasoned marketing professional with a wealth of expertise in our company’s core offerings. With an unwavering passion for driving growth and innovation, she plays a pivotal role in shaping our marketing strategies and enhancing brand visibility. A key aspect of her responsibilities......